Labflow Navigation Labels and Warnings
Here you will find many of the labels and warnings you might encounter while working in Labflow.
Profile/Account Menu
Click the user menu icon (last button) in the left sidebar menu.

- Add to my calendar (not shown) - sync due dates to your personal calendar
- Switch section (not shown) - change your section
- Profile - edit your name or anything else about your profile,
- Change password - reset your password
- Labflow Idea - share any ideas for Labflow improvement
- Support - create a support ticket or view articles to help address any technical issues
- Logout - log out of your account.
Site Navigation Menu
On the left there are several icons.

- Labflow icon - hover over to view the course name
- Courses - all the courses in which you are enrolled
- Home - go to the main page of your current course
- Grades - view your grades.
- Current Grade
- Hidden - the assignment or grade is not visible to you yet
- Pending - the grader has not posted the grade to the gradebook yet
The glossary in the gradebook also appears here:
- Grade Item - graded activity in the course
- Score - score on the activity out of the total points for the activity; activities that are not started are indicated with a hyphen (-) and are not included in the course total
- Percentage - percent score on the activity
- Weight - the percentage an activity contributes towards the course grade, the sum of all the weights will equal 100% at the end of the course
- Weighted Grade - the grade for the activity based on percentage and the weight it contributes towards the course grade
Content of the Course
The course is laid out by experiments/topics or weeks.

- Click EXPAND ALL to expand each topic and see all resources within it.
- Click COLLAPSE ALL to collapse each topic.

The due dates for your assignments will appear on the assignment itself.
- Opens or Opened - when the assignment is available to work on
- Closes or Closed - when the assignment is due. Please note that the dates are presented in the order month, day, year.
Videos
After clicking into a video, you can click on the “CC” button of a video to have subtitles turned on.

You can also choose “Transcript” to read the transcript of the video.
Quizzes
When you click into a quiz, you see the summary of your work on the quiz, including the number of attempts you have had and the number of “Attempts remaining”. Click on the “Attempt Quiz” button to start work on the quiz.
To work through the quiz, click on the Next or Previous buttons at the bottom. After working through all questions, the bottom right button will have the text “Review”. By clicking Review, you will see all the questions listed. If you are done, all questions should have the text “Answer saved” under them and you can click “Submit all” to submit the quiz.

If there are any questions with the text “Not yet answered” under them, click on the question number or “Continue Current Attempt” to go back into the quiz and answer the question.
Reports
Within a report, you will often first enter values in a "Validated Section" and then complete further calculations or analysis of those values in the "Graded Section". If you have the option to Request Provisional Data, you should ONLY do this if instructed to do so; you will not be able to change this choice after confirming it.
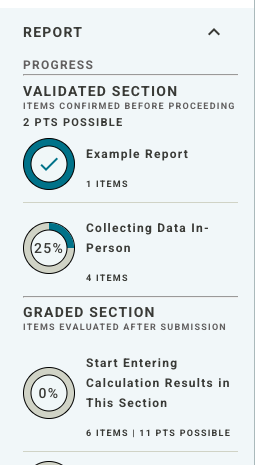
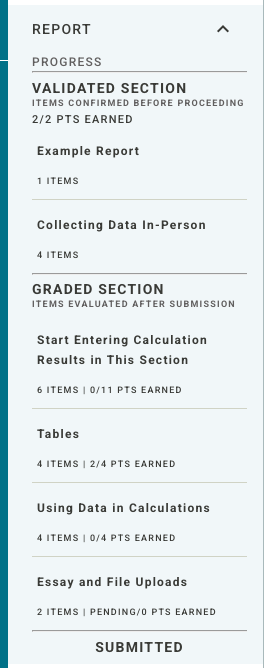
In the sidebar, you will see an overview of the report, including which groups are in the Validated Section and Graded section and how many items are in each group. As you complete items, the progress graphs will update. These graphs only indicate that you have responded to the questions, they do not indicate correctness.
While entering values in the Validated Section, you may have feedback pop up that you have entered an unacceptable value. The feedback will tell you how to fix the entry, such as the one pictured to Enter numeric values only (e.g. 123.4 or 1.234E+2). After fixing the entry, you can click Try again to move on.

When you have completed entering all the entries in the Validated Section, there will be a notification that you are about to move into the Graded Section. Your options are to Proceed or to Review and change your entries in the Validated Section. Once you hit Proceed, you have locked in your responses in the Validated Section and will not be able to change them.

In the Graded Section, you will be prompted to answer questions. You may need to upload a file or image to answer these questions:

Click on the Browser Files button to enter the File Picker menu and choose the image or file you want to upload.
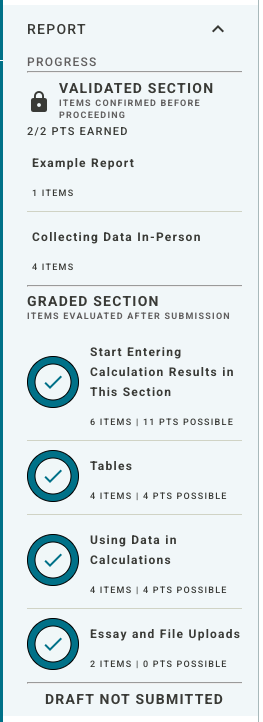
When you have completed all the questions in the report, you will see that all of the sections and groups have been marked complete in the side bar. If there are any groups that are not marked complete, then there are unanswered questions and you should review the report to make sure you have answered all of the questions that are required.
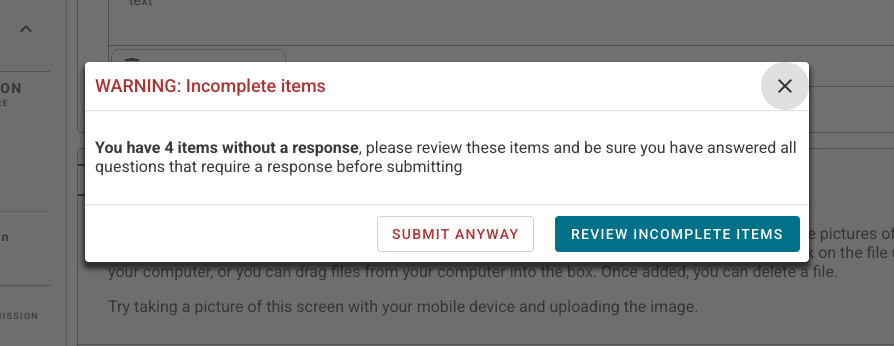
When you are ready, click the “Submit Attempt” button. If any of the items are blank, a notification will pop up warning you that there are incomplete items. You will have the option to Submit Anyway or Review Incomplete Items to go back into the report and see which items were left blank. If you choose to Review Incomplete Items, any items that were left blank will be flagged as Incomplete, so that you can easily find them.Sometimes a report will have optional items which you intentionally left blank; although these will be flagged as incomplete, you should submit anyway. Any optional fields should be indicated as such in the report.
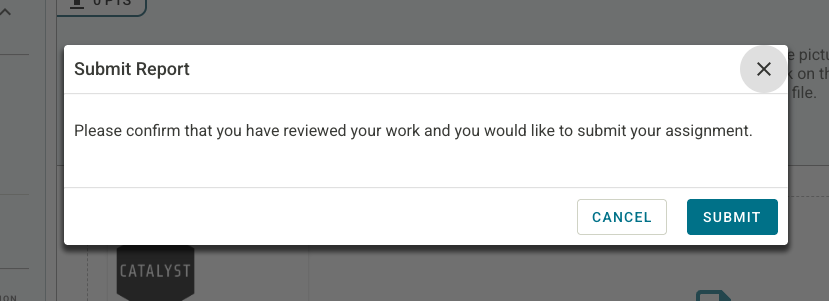
If all of the items have a response, a notification will pop up to check your work, which states “Please confirm that you have reviewed your work and you would like to submit your assignment.” You can choose to Submit to turn the report in for grading or Cancel to look back at your report and edit your responses.
After submitting the report, the sidebar will update to reflect the points earned in each group. If there are still items which need to be graded, you will see the total for the group as pending.
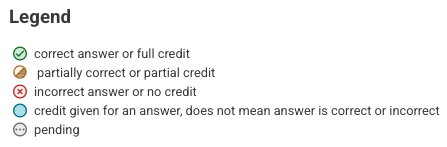
While reviewing your submitted report, there is a legend to help you understand the markings.
If your instructor has allowed multiple attempts on the report, you will be able to adjust your answers in the Graded Section by clicking on the button labeled “Attempt Activity Again” at the bottom of the page. A notification will pop up to confirm that you want to retry the calculations and questions of the report. You can choose to “Confirm” or “Cancel”. When you start a new attempt, all of your responses from the previous attempt will still be present; you do not need to start all over. However, you will only be able to adjust your answers in the Graded Section of the report, you will not be able to adjust your responses in the Validated Section.

After you are completely done with the report, you can click on the “Summary” tab to see the points earned. Any question with a blue circle on this page indicates that the grade is “pending” because a grader needs to grade it.
Was this article helpful?
That’s Great!
Thank you for your feedback
Sorry! We couldn't be helpful
Thank you for your feedback
Feedback sent
We appreciate your effort and will try to fix the article